
I am compelled to write this tutorial with the urgency to assist those having the fear or simply not knowing “How To”. Between my 2 units of Redmi Note 3, I have experiment, probably a dozen times into flashing and other stuffs which is not a pleasant experience, as I do get my heart tumbling, when I come to a point when I am not able to switch on my device or laying there motionless, so to speak. Anyway, it is quite difficult to get a bootloop or to bricked your device with some acquired skills.This is a “Successful Hands-on” experience which I simply need to share especially with the newbies, and overcoming the fear to do a right thing…
NOTE:
Constant:- System Windows 7 Pro SP1 & Windows 10 Pro with a pre-loaded MIUI 7.1 Stable 7.1.1.1 (LHNCNCJ) ROM from the vendor.
SP Flash Tool can perform image flashing which is very useful for fixing softbrick or bootloop cases through the flashing of Stock ROM to restore the factory defaults.
Highlights:-
- Flash Stock Rom
- Flash Recovery
- Memory Test
- Parameter Setting
- Format Device / Hard Reset
Let’s get started with flashing a Stock ROM:-
What you need:-
Download MediaTek USB VCOM drivers Windows 10/Pro users: READ: Installing MTK VCOM driver on WINDOWS 10 (32 & 64 bits)
Download SP Flash Tool
Download RedmiNote 3 Latest China Stable Version Fastboot File Download
Be sure to Enable USB Debugging:-
Go to About phone > tap MIUI version at least 7 times to activate the Developer options. Go to Additional settings > Developer options > USB debugging > Enable it.
The required files, as shown below:-
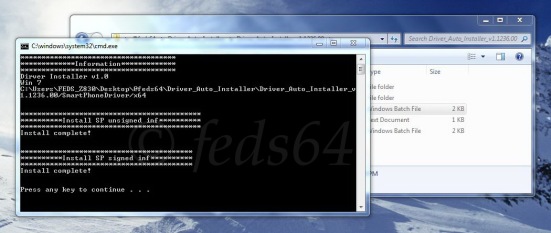
IMPORTANT:- Next, you need to install drivers in order to connect your device properly, just extract Driver_Auto_Installer_v1.1236.00.zip, and double-click “Install.bat”, and it will automatically install the necessary drivers, and allow permissions for these drivers to be installed.
CHECK:- You should have at least more than 50% battery remaining and switch off your phone at the same time.
Unzipped, both SP_Flash_Tool_exe_Windows_v5.1516.00.zip and
Hennessy_images_V7.0.16.0.LHNCNCJ.tgz.
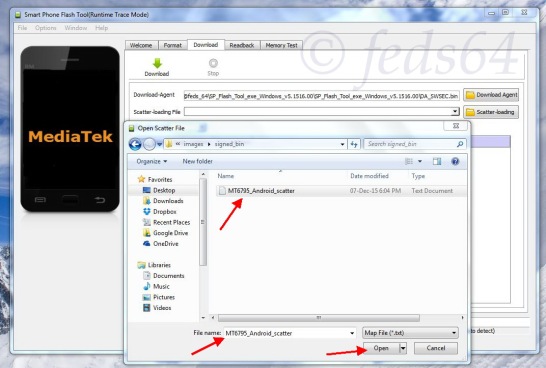
Next, goto the Hennessy_images_V7.0.16.0.LHNCNCJ folder, move the “MT6795_Android_scatter.txt” into the “signed_bin” folder, as shown below:-
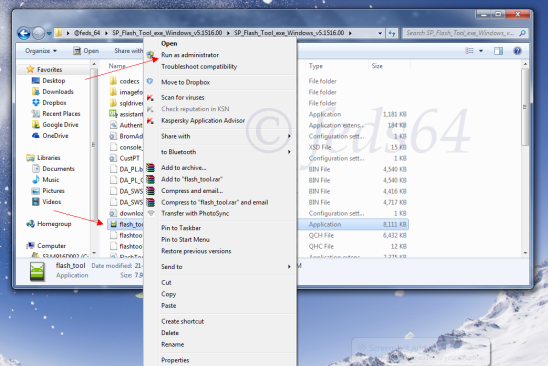
To install SP Flash Tool, right click your mouse and “Run As Administrator” and change the language to English accordingly, as shown below:-
Next click on the “Download Agent” and locate “DA_SWSEC.bin” from the unzipped SP Flash Tool folder earlier and click Open, as shown below:-
- If you are using a vendor ROM, in most cases they have altered the MIUI Version via a Build.prop editor to their choice, eg. 7.00.99.00 which is based on 7.0.9.0 officially, leave it “as-it-is” “Ticked”.
- If you have flashed prior to this, a Custom ROM eg. SphinX v*.** only then you “Untick” or get back to the OP and enquire how to flash to a Stock / Proprietary ROM / Firmware or another Custom ROM to avoid corrupting your kernel thereafter “Bricking” your device. Should you “Bricked” your device, there are procedures to unwind that.
- If you have flashed TWRP on your device prior to these, you can “Untick” to keep your TWRP recovery, otherwise it will it wipe it off.
- If you have alreaady customized your logo, other than the Mi logo and keep it, you can “Untick” it.
Now click the “Download” button.
DEVICE: Still in Off-state, PRESS and HOLD the Vol (-) Down (release only when the yellow bar comes out), immediately, followed by connecting your device to the PC/Laptop via USB Cable.
TESTED: Jan 16, 2016
For users how do have an error message while using method of Press & Hold “Volume Down” button, you could alternatively use the combo option of Press & Hold “Vol Down + Power” button and release upon sighting the Chip Info box on your left.
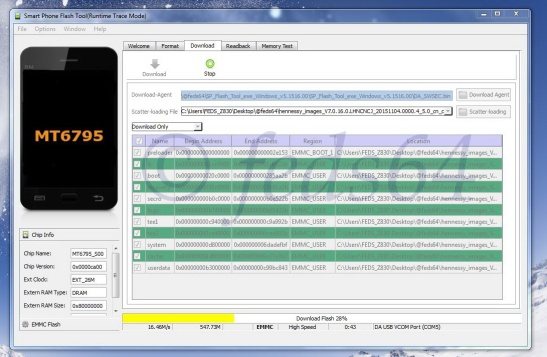
You will immediately see the progress bar going Red, Purple momentarily, and Yellow for a few minutes until the flashing process is complete, as shown below:-
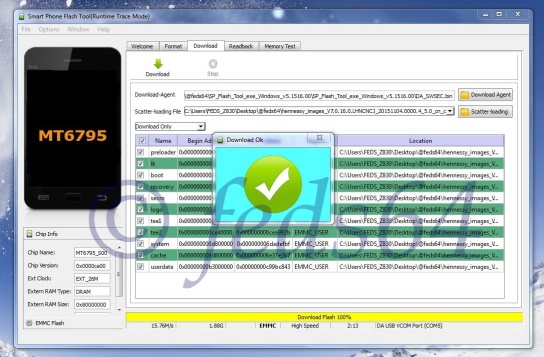
When it is completed and successful, you see the 100%, yellow full bar and a big check mark.
You have successfully flashed the current Stable MIUI 7 V7.0.19.0 LHNCNCJ and your phone will then reboot itself accordingly.
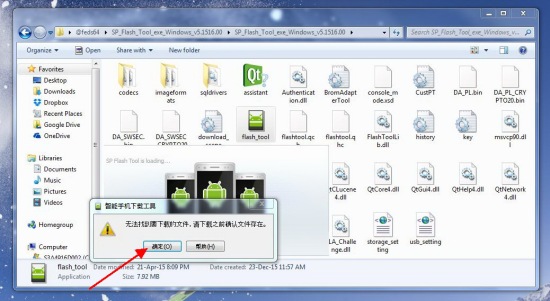
Error messages you may encounter, as shown below:-
This message will popped-up when you are press the wrong combination keys…
DISCLAIMER:- Flashing can potentially bootloop or softbrick your device. DO IT AT YOUR OWN RISK.










Am getting error acc to your #1 which says pressing wrong key but I tried both methods. what to do now?
Just make sure battery is fully charged, use USB Data cable, swap between USB port… And just get the right timing when plugging the USB from the time after you click download…
When I download an up to date rom from the up to date fastbook rom link you gave, it doesn’t give me a folder, only the .tgz file. Will everything still work if I only have that file? I would be unable to complete: ‘Next, goto the Hennessy_images_V7.0.16.0.LHNCNCJ folder, move the “MT6795_Android_scatter.txt” into the “signed_bin” folder, as shown below:-‘
The up to date rom is 7.1.6 and my phone came stock with the two that you use as an example.
Thanks.
You need to unzipped the tgz file to get a folder…
ah thank you! It wouldn’t let me unzip anything with my normal decompression program, but I found one that worked.
Now, when I’m at the final step, it never shows the chip information and my bar goes red, as in the screenshot below. http://postimg.org/image/6fcbvaac9/
I tried both button combinations, and have held for long period of time but no change.
Is this a problem with the drivers, or perhaps the connection to my computer isn’t good?
Is there an error message? If there is, please take a screen shot. Thanks…
nevermind, I got it to flash after adjusting the drivers. Thanks.
Hahaha… Okay, I am glad you got it sorted out…
Hi i am getting error 8417 when i input the scater file. I tryed different methods ( different versions of SP Flash tool, different scater files from different ROM’s ) and i still get the same error ?!?! Any tips on this please? Thanks a lot
Can you please state the device and file you are using? Obviously this error will appear if a wrong scatter file is being used.